Repointing: How to Properly Restore Old Buildings
By Mario Cantin
 So much has happened in the last 100 years: the automobile, electricity, the airplane, two world wars, television, space exploration, computers and a lot more. Consequently, we live faster ? and we build faster as well.
Unfortunately, unless you are over 90 years old, masons have never been exposed to how our predecessors used to build, due to the advent of the modern cavity wall and cement-based mortars, which have replaced traditional bonding methods and lime-based mortars. This only becomes problematic when we attempt to repair older structures. It is especially made evident when repointing is attempted on older buildings using the wrong mortar mix ? and the wrong joint finishing style to boot.
Just as we do a professional job when building new masonry projects, we can achieve the same degree of quality through acquired knowledge when tackling older structures.
Definition of the Terms
So what do you need to know? Let's start with this basic question: What is repointing? Have you ever wondered what the difference is between the words "pointing," "jointing," "repointing" and "tuckpointing"? Although there is no longer a distinction, even among engineers, between the terms, over a century ago the difference was clear.
"Jointing" referred to the process of finishing the joint as the brickwork was erected. Jointing is what all bricklayers do today.
"Pointing" denoted the placement and careful tooling of a mortar joint between bricks or stones. In contrast to jointing, pointing was the process of raking back the mortar joint a few days after the completion of the brickwork and was usually done by a different crew that was skilled in delivering a high-quality, consistent decorative finish to the joint. Also, jointing was performed at the rear and sides of a building, with only the front fa?ade being pointed.
"Repointing" referred to replacing a mortar joint when it had failed, on average about once a century. This was typically the type of restoration work completed on older mortar.
"Tuckpointing" (Figure 1) is an interesting one, which will need further explanation.
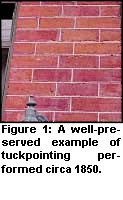
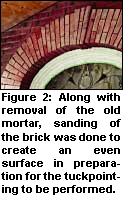
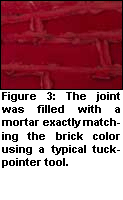
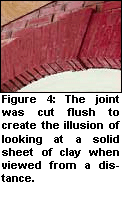
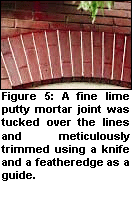
The word "tuckpointing" once referred to a specialized application of pointing that consisted of first sanding the bricks to a smooth, even surface (Figure 2), then masking the original mortar joint with a thin one that matched the brick in color, usually red (Figure 3). One would have created ? up to this point ? the illusion of looking at a solid wall of clay, as opposed to a wall consisting of individual bricks (Figure 4). Then, after having rubbed the red mortar with a piece of jute and dying the work to a uniform color, fine lines were cut with a knife into the "masking" mortar while it was still soft, in a rigidly symmetrical fashion to produce a perfect geometrical outline of each brick. At that point, a fine, usually white, lime putty mortar joint was tucked over the lines and meticulously manicured, you might want to say, so as to create the illusion that the wall had been laid with perfectly rectangular bricks in a mortar bed as thin as 1/16th of an inch! (Figure 5)
Tuckpointing originated in England in the 17th century as a cheaper alternative to gauged brickwork ? which was the ultimate method of laying bricks, consisting of rubbing the stones to exact dimensions and perfect edges, then dipping them lightly into lime putty, providing a true 1/16" joint. Tuckpointing subsequently became the pointing style of choice during the Georgian and Victorian periods, minimally for the front fa?ade of brick buildings.
If you live by or have visited older towns where Georgian and Victorian brick buildings are prevalent, you undoubtedly have come into contact with true tuckpointing, whether you've realized or not.
It is interesting to note that "hiding" immediately behind what seems to have been a misunderstood nomenclature was a lost art, which, I am pleased to announce, has now been fully brought back to life in North America.
The Recipe for a Proper Repointing Job
All recipes require ingredients. For the repointing of older structures, the ingredients consist of:
1) The Mix. Over a century ago, mortar had a different composition than the mortar used in modern masonry. In the past, mortar was produced from limestones that were fired at a high temperature, turned to powder, and then water and sand were added. It was called a lime putty mortar or a traditional lime-based mortar. Logistical problems, such as slow setting and lengthy preparation, led to the search for an easier product. One thing led to another, and Portland cement, which was invented and patented in England in the 19th century, eventually became the main mortar ingredient, making the traditional lime-based mortar obsolete for new construction.
 As a general rule, if the building was constructed prior to 1872, it should be repaired with a traditional lime-based mortar consisting only of lime and sand, as well as some color pigment. If the building was built between 1873 and 1932, it should be repaired with a mortar that consists of lime, some Portland cement and sand, as well as some color pigment. This is still considered a traditional lime-based mortar. If the structure was built after 1930, it can be repaired with a modern cement-based mortar, although I personally find that some buildings built up to about 1945 are best repaired with a mix consisting of Portland, lime and sand.
2) The Sand. Don't assume that the sand you always use will do! Have a look at the sand used on the building you will be restoring and see if you can get a type of sand in your area that will, at least approximately, match it.
3) The Pigments. The typical mineral oxide pigments available at your local masonry supplier will do.
4) The Joint Finish. There used to be many styles for tooling a mortar joint, which not only require the right tool but also the skill.
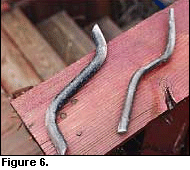
 On the one hand, producing the proper texture in the mortar joint consists of using a mix that matches the existing. On the other hand, getting the texture right consists of acquiring the skill of matching the way the mortar was tooled. This is a skill you usually acquire by looking at the existing mortar on the wall and then working at reproducing the texture. Stay away from simply and arbitrarily using a rounded tube to finish the joint ? the same tool that bricklayers use when they are jointing the work (Figure 6). This will work with a modern wall that needs repointing, but it will never work for an older building.
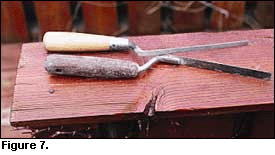
Repointing structures built before 1930 usually requires a recessed joint of some sort, due to the eroded nature of the existing surrounding mortar that will not have to be replaced, but must be matched both in color and texture. Slickers are a better way to go for this type of joint (Figure 7).
A lot more can be said on the subject of brick and stone mortar restoration. Luckily, most of our past has been well documented in one way or another, and it's usually possible to find out through research what we need to know to do the best job possible.
About the Author
Mario Cantin, president of Invisible Tuckpointing Ltd., located in Ontario, Canada and Lewiston, N.Y., offers brick mortar replacement with a perfect color match and teaches others how to earn a six-figure income doing the same.


