Flashing: Flashing in Masonry
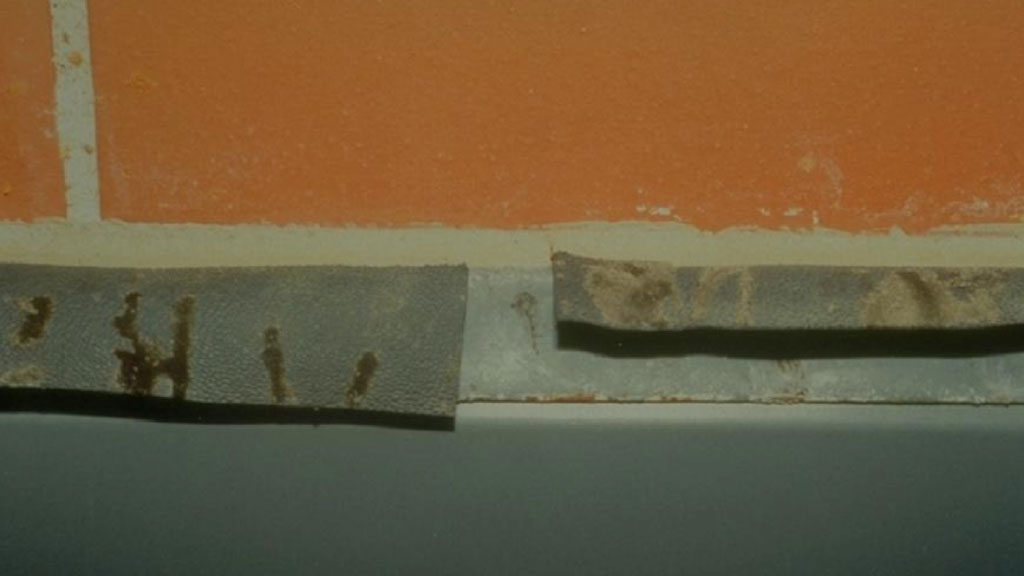
Figure 1. Protruding membrane flashing with a gap at a lap location.
Many of the biggest dilemmas (and lawsuits) involving masonry construction have nothing to do with brick, block, stone, mortar, or grout. When masonry leaks and fingers start pointing, there are usually lots of eyes that look immediately to flashing within the masonry. There is good reason for this attention. Flashing is where we intentionally collect and divert moisture within a wall system. Therefore, it is also one of the most likely places to experience moisture infiltration when things go wrong.
Fortunately, there are increasingly abundant resources that provide guidance on flashing installation. And many leaks can be eluded by avoiding just a few common issues. Let’s look at a few:
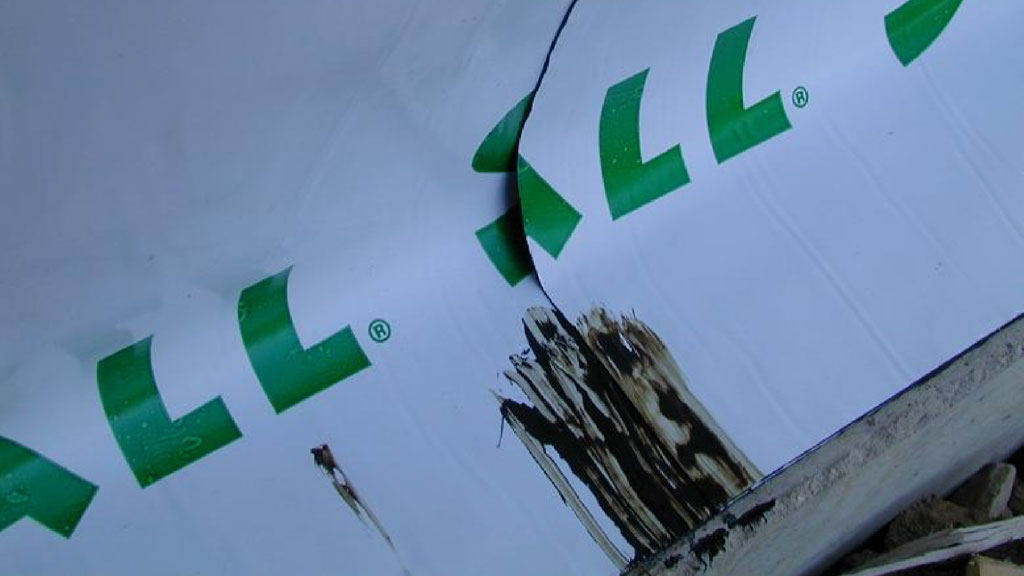
Figure 2. Lap in membrane flashing that has tenting and an associated gap at the back surface.
Laps in Adhered Flashing
One of the most common moisture infiltration locations in masonry flashing occurs at joints or laps in the flashing. Self-adhered flashing can be awkward to work with, and it is not uncommon to end up with gaps between pieces or tenting and incomplete contact. Water sitting on this flashing often finds its way into these imperfections and can create problems for everyone involved. To reduce problems at laps, institute a careful training and inspection protocol for flashing, including how to seal each lap. Make sure your crews understand that few extra feet of flashing and some butyl sealant are a LOT cheaper than a lawsuit. Don’t forget about laps and terminations at the top edges of your flashing. Make sure that termination bars are installed and sealed in accordance with the manufacturer’s requirements.
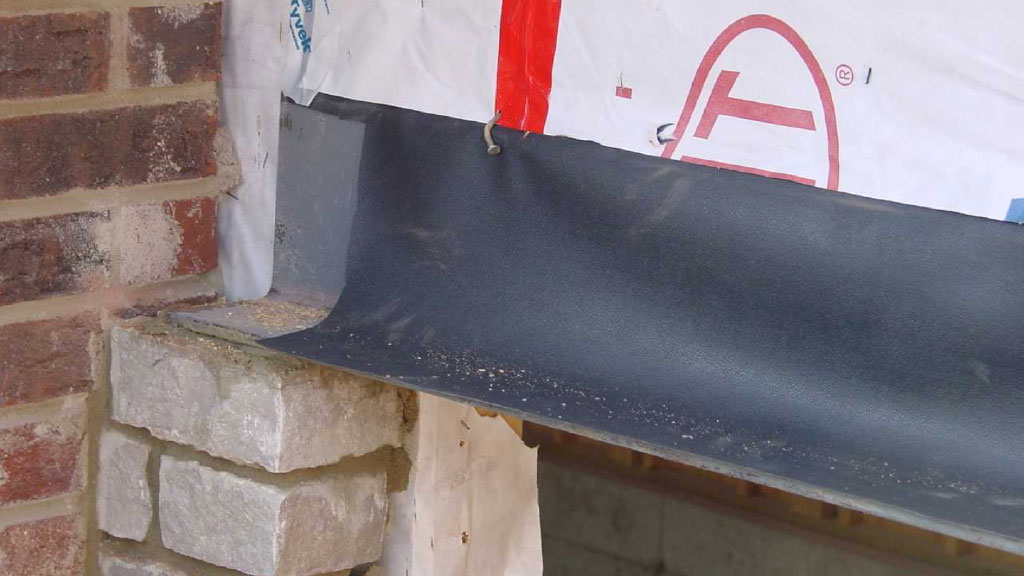
Figure 3. End detail at a lintel where the flashing stops short of the end of the lintel.
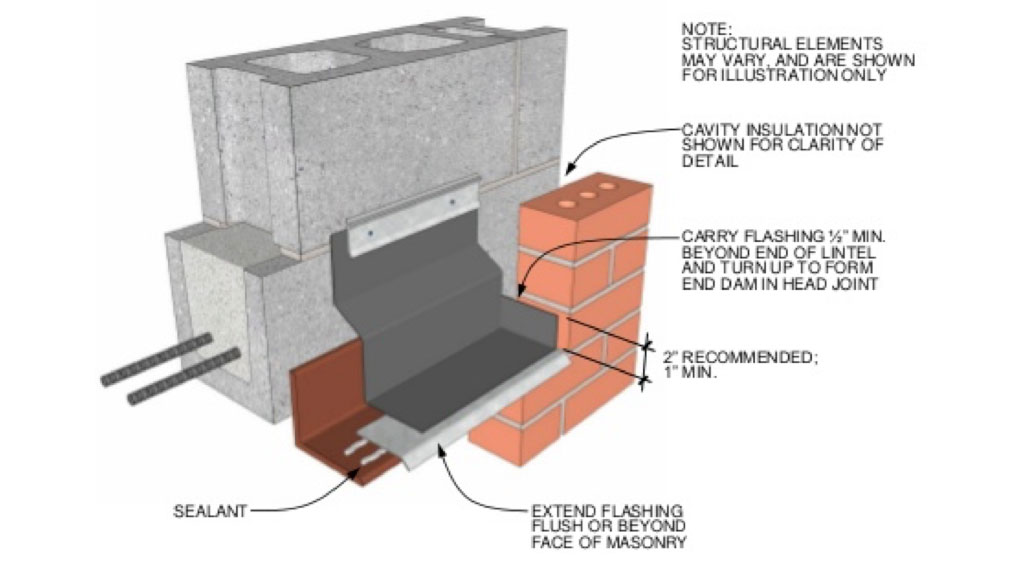
End Conditions and End Dams
In many masonry applications, flashing installation within the field of the wall is done correctly and efficiently. However, when a lintel or shelf angle terminates at or near an inside or outside corner, things unravel. The flashing approaches that worked in the field of the wall suddenly don’t “fit”, and getting material around corners and into tight spots can be a pain. However, these awkward locations will be some of the first spots that a plaintiff’s expert will open up to examine your workmanship. Therefore, pay special attention to all inside and outside corner conditions, and use prefabricated corner boots whenever possible. Again, the tens of dollars you spend now could save you thousands of dollars later.
Clogged Drainage Cavities
Although there have been good mortar dropping control systems for masonry on the market for many years now, clogged cavities around flashing continue to be problematic on some buildings. One of the common issues is a tight drainage cavity due to the installation of external insulation. If your project specifies a cavity less than 2” wide, send the design team a letter with a copy of BIA Technical Note 21 and ensure them that there will be mortar bridging with a narrow cavity design. Also, try to get as many weep vents as you can at your flashing. Air flow through these vents helps dry out the masonry in addition to water drainage though the weeps. Air does not flow well through rope wicks, by the way...
Drip Edges
Water is amazingly creative and stubborn when it is flowing through masonry. Whenever possible, use drip edges to get as much water as possible out of the masonry and off of the masonry surface. The Building Codes are edging toward drip edge requirements, so encourage your design team to bite the bullet and put them in. They really don’t look bad. I promise!
From the Masonry Systems Guide by the International Masonry Institute.
For more information and some great drawings of proper flashing installation, check out some of the following websites: